
Getting Started with the Vodia IOP: Part 1
Vodia, one of the leading developers of enterprise communications solutions, released a full-fledged PBX no bigger than a deck of cards: the Vodia IOP. The device is prebuilt & ready to deploy with a four concurrent call license. It has the ability to license up to 16 concurrent calls. Although the device is quite compact, it can run the complete Vodia PBX software on a state-of-the-art embedded server. Any business can easily & inexpensively run a professional phone system which includes features such as:
- Low energy consumption
- 4 simultaneous call license pre-installed
- Support of up to 16 simultaneous calls
- Industrial strength 64 GB SD card (10,000 hours call recording)
- No moving parts that can make noise or break
- Compact size & mountable
- Administration & management through the web
- Compatible with all popular SIP phones & SIP trunks
The Vodia IOP unites all of these convenient features into a palm-sized unit. Size can be deceiving, though. The IOP is packed with a powerful H2 quad core Cortex-A7 with 512 MB RAM. It is also powered by 5v of power, helping to ensure its the most stable solution on the market.
Setting Up the Device
Finding the IOP Device: In order to find your device, plug in your IOP into your local LAN. Power up the device by using the AC adapter provided in the box.
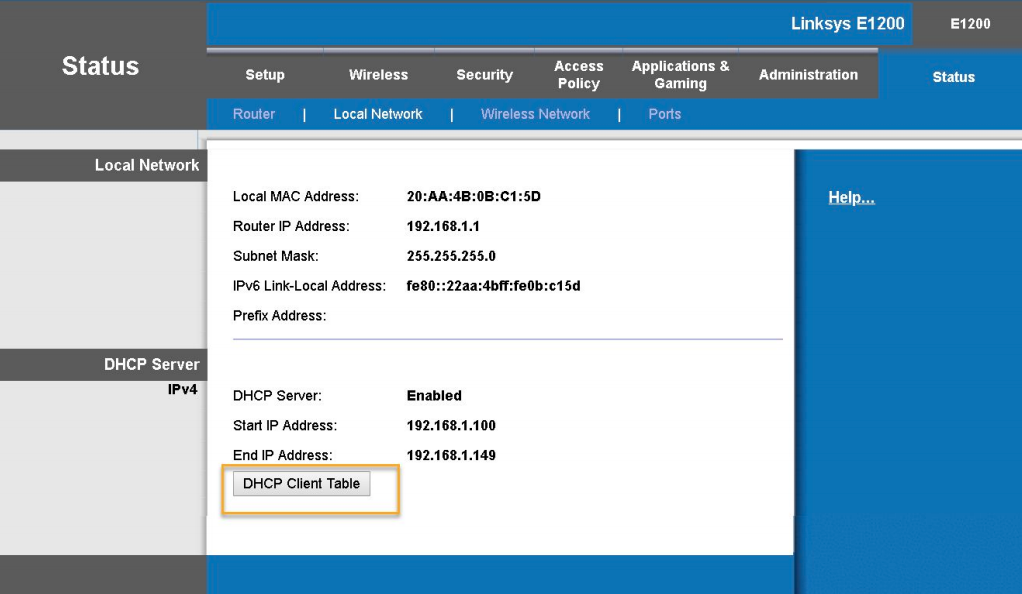
Next, log into your router and navigate to your DHCP list. You will find the IOP IP address there.
DHCP Reservation: Reserve the IOP IP address on your router to prevent the IP from changing. This is extremely useful when installing the IOP device in either a small or mid-sized office that already has many devices on the LAN.
Accessing the Web GUI & Setting a Password: One of the key features of the Vodia IOP is its web-based administration interface. The Vodia IOP supports Google Chrome, Firefox, Microsoft Edge, and Safari. First, begin by logging into your Vodia IOP device. Use the IP address provided by your DHCP. Your user name will be “admin” and no default password will be set at this time.
Upon logging into your device, you will need to assign a new user name & password. You will go to the Security tab and choose General. Under Administration Login, create a user/password for the system. Log out and then sign in with your new credentials.
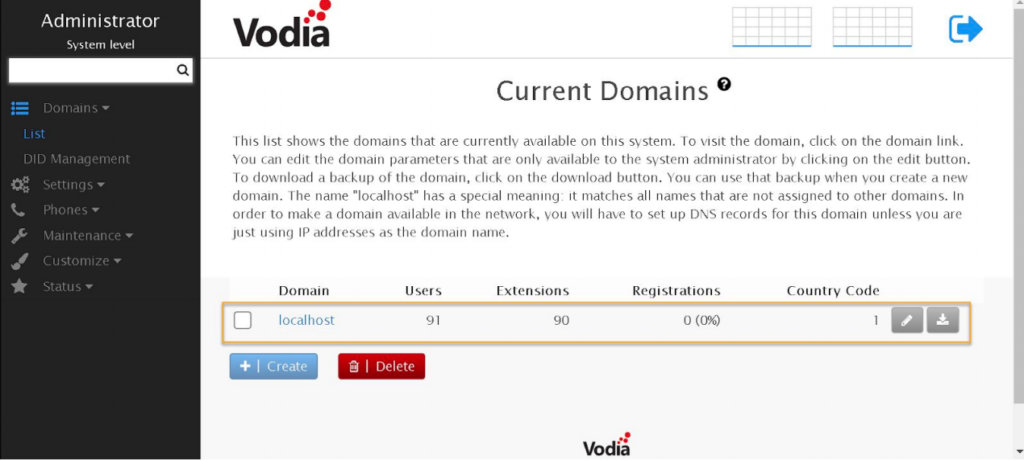
Configuring Domain System Settings: The Vodia IOP will detect your geolocation automatically, setting up your zip/area code and time zone. To ready the domain for phone provisioning, click on “localhost.”
You can set a name for the domain by going to “Features” and choosing “General Settings.” Add your country code, area code, and a default ANI if your SIP trunk provider has assigned you on. Under emergency number, add 911. Under ANI, you can add the caller ID of your company’s main number. This is extremely useful when an extension calls 911 because the IOP PBX will send the emergency dispatcher that caller ID information.
Next, scroll down to “Provisioning Parameters,” where you will assign a user, password, and pin. This information will be utilized whenever you want to log into a provisioned phone to change settings or troubleshoot a unit. There are a multitude of parameter settings in this section, including:
- Default PNP dial plan scheme: This setting allows you to set auto-dial & configure timeout-based dialing.
- Authentication user/password: This setting enables an administrator to create identical user names & passwords for all of the devices in a domain.
- Authentication PIN: This setting allows an admin to override a user’s PIN (which is used on the phone itself). By having admin access to the phone, the phone can be reset.
- Proposed SIP transport protocol: The transport layer can be pre-selected on extension level, domain level, or system level.
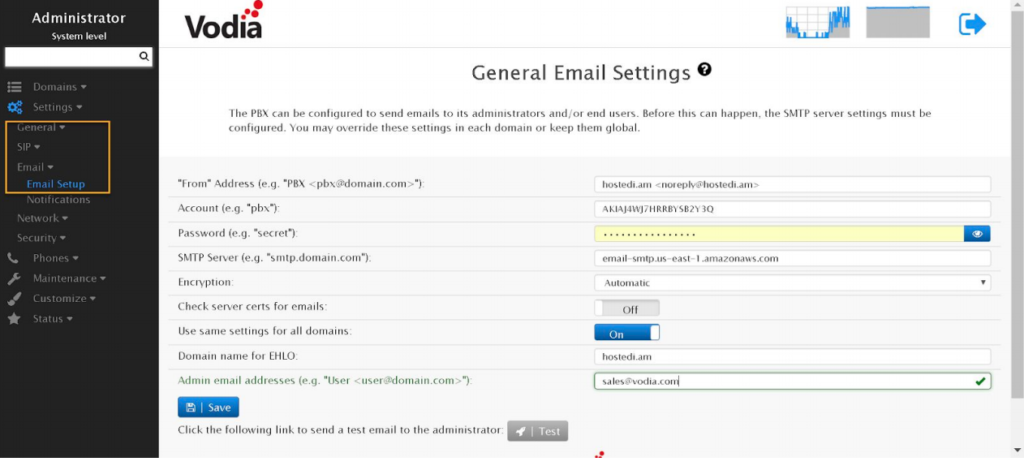
You will also want to set up SMTP. The Vodia IOP can send out voicemail attachments & other important information about the system. You can set up and change these settings under “General” > “Email” > “Email Setup.” The settings you can change include:
- The “from” address (ex: [email protected])
- Account (the email account of the SMTP server)
- Password (the email password of the SMTP server)
- SMTP server (your SMTP outgoing mail server)
- Encryption setting (ability to activate/deactivate TLS)
- Automatic Encryption
- Don’t Use TLS
- Always Use (if your mail server requires TLS)
The second part of the “Getting Started” rundown will include creating extensions, configuring desktop phones, and creating SIP trunks. For more information regarding the suite of Vodia products, including the IOP device, contact the 888VoIP Channel Account Managers at 888-864-7786 or by emailing [email protected]. Also, visit the Vodia Featured Solutions page for even more information!