
Getting Started with the Vodia IOP: Part 2
As a continuation of our last post, Part 1, we will further delve into setting up a Vodia IOP. To reiterate, the Vodia IOP is a compact, feature-loaded all-in-one SOHO PBX. The device is prebuilt and ready to deploy with a four concurrent call license. Looking for more calls? The device has the ability to license up to 16 concurrent calls.
Part two of our series will cover topics including: creating extensions, provisioning desktop phones, and configuring SIP trunks.
Setting Up The Device, Cont.
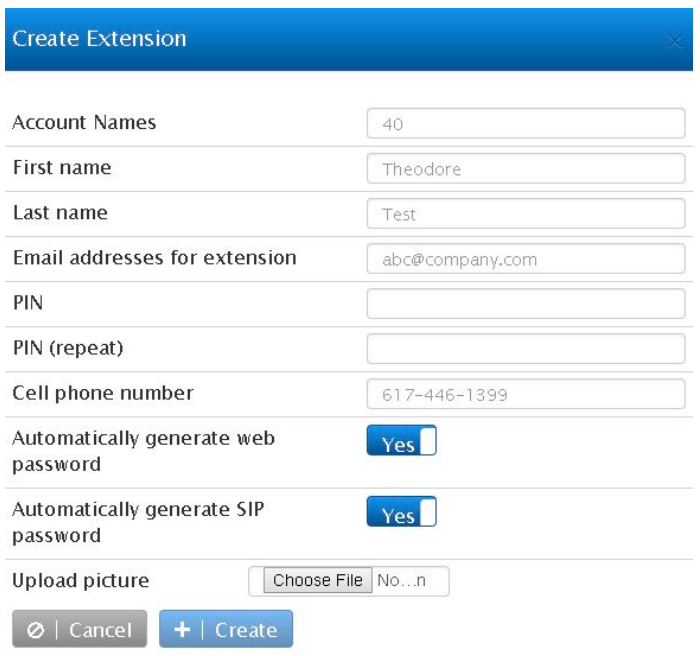
Creating Extensions: In order to make and receive calls, an admin must create extensions on the PBX and register the extensions to IP phones. To create an extension on the Vodia IOP, navigate to your domain “Localhost” under “Accounts” and click “Extensions.” By clicking on the “Add” button, you can create an extension.
There are a multitude of customizable extension settings, including account name, first/last name, email address, and cell phone number. To learn more about these particular extension settings, review the table on page 12 of the Vodia IOP Guide.
Configuring a SIP Desktop Phone: Once extensions have been created, a SIP desktop phone can be configured. The Vodia IOP supports the following desktop phones that are available through 888VoIP: Yealink, Cisco, Grandstream, Snom, and VTech. To see a list of all of the supported models, visit Vodia’s Supported Phones page.
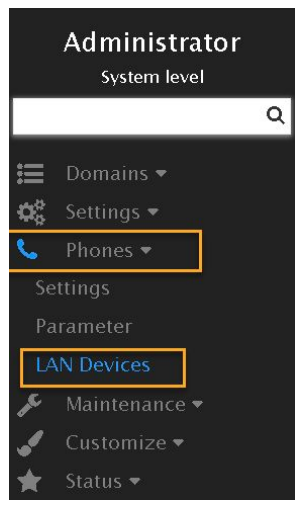
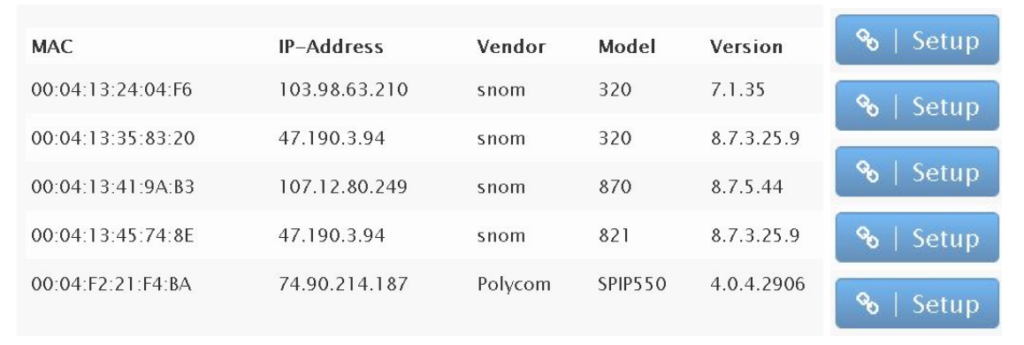
You can configure any supported SIP desktop phone if the phone is located on the same LAN as the Vodia IOP. Before provisioning your device, make sure the unit has been set to factory default. In your web management dashboard, switch to “Administrator” and navigate to “Phones” > “LAN devices.” The Vodia IOP will present the MAC address of the phone, IP phone, vendor, model, and version. Click on “Setup” and choose the extension that you’d like the IOP to provision. Your desktop phone will reboot and upgrade. Your phone will register (dependent on model) and will be ready to use.
Configuring Buttons: Although different phone models have different button templates, the Vodia IOP supports every type of button you could need/want/use. Available buttons include:
- Private Line: Multiple local lines can be configured on IP phones
- Auto Attendant: Monitor auto attendant account
- Hunt Group: Monitor hunt group account
- Agent Group: Shows an Agent’s login/logout status
- Extension BLF: Mode shows when the specific extensions are in use (Green/Red/Blinking)
- Service Flag: Allows you to change the status of a service flag
- Park Orbit: Provide a holding place where calls can be parked while the callee is being located. Can be retrieved by other users
- IVR Node: Monitor IVR account
- CO-Line: Channelizes a trunk and can be used in a way similar to the CO-lines of traditional TDM-based PBX systems
- Paging: Page an intercom device or users on the system
- Speed Dial: Can be used for phone numbers, extensions, star codes, and other numbers
- Intercom: Sets up intercom functionality
- Do Not Disturb: Shows an extension’s DND status
- Agent Login/Logout: Can be used in a number of ways to show status
- Redirect: Redirect calls to a predefined extension or number
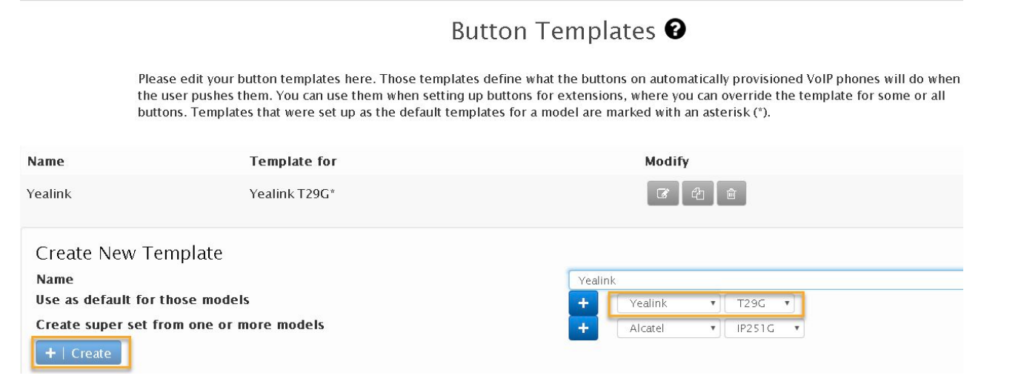
Create a master button template using the web management tool. Simply navigate to “Advanced” > “Buttons.” By using the button template, you can create a list of buttons based on the make and model of the phone. Name your template. Then choose your model phone under “Use as Default for those Models” and press “Create.”
After a button template has been created, you can modify it to fit your company’s needs. Merely click on the “Modify Edit” button. Depending on how many line keys your phone has, the Vodia IOP will display keys 1-27. If you’re using a sidecar, you can use line keys 1-27. If you’re choosing an account like Extension BLF, Agent Group, or Paging, the Vodia IOP will show you a parameter. You will choose an existing account on the system by clicking the plus button. A dialog box will open, allowing you to choose an account you’d like to monitor. Once an account is chosen, the IOP will automatically generate the name under “label.”
Once the button template is complete, save to continue. To assign a button template to an extension, go to the extension list, choose an extension, and navigate to buttons. The IOP will use the default template available in the domain (if it exists). The button template will then be chosen for that extension.
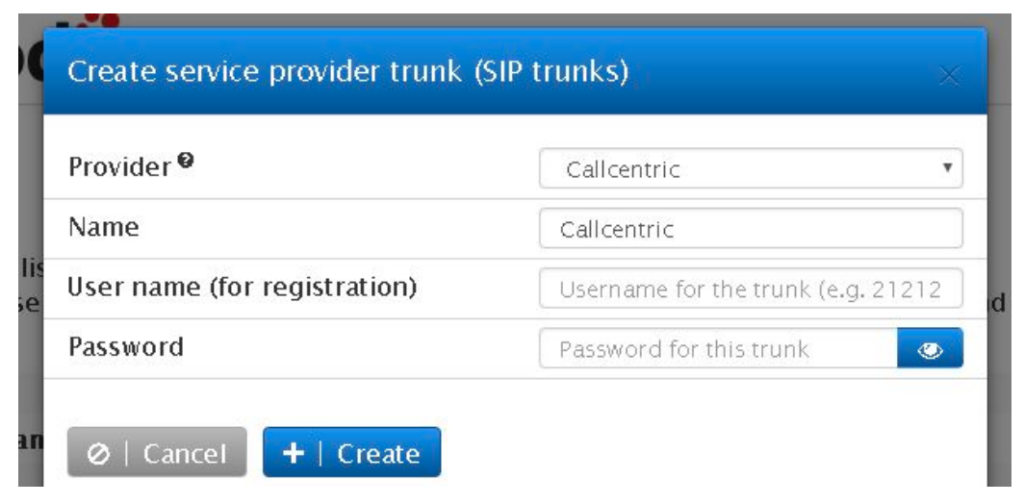
Creating a SIP Trunk: Vodia IOP supports a multitude of SIP trunk providers. Whenever a SIP trunk is created, the IOP will automatically create a default dial plan for the domain. It is easy to create a SIP trunk. Navigate to “Trunks” > “VoIP Trunk Providers.” In the drop down, choose your provider. Enter the account and password. The IOP will enter the default values based upon the trunk template.
Inbound Call Routing: Once you’ve created a SIP trunk, it’s time to set up inbound calls. Navigate to your SIP trunk and go to “Routing/Redirection.” Under “destination for incoming calls,” choose one of the following:
- Send Calls to the Destination in the Request
- Send All Calls to a Specific Account
- Send Call to 10 Digit DID
- Use a List of Expressions
The third part of the “Getting Started” rundown will cover recording, user voicemail, cell phone configuration, and more. For more information regarding the suite of Vodia products, including the IOP device, contact the 888VoIP Channel Account Managers at 888-864-7786 or by emailing [email protected]. Also, visit the Vodia Featured Solutions page for even more information!