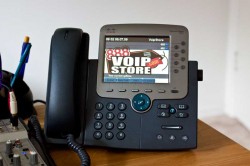
Configuring Cisco 7975 IP Phones for SIP
 Anyone who has had the “pleasure” of trying to configure a Cisco 7975 phone with a SIP IP PBX system such as Asterisk, trixbox, or 3CX can attest to the fact that the phones are very picky with their config files and much of the information that is really handy to know is simply not documented anywhere. On top of that, to get the phones to even work right you have to use very specific versions of the SIP firmware as the phones are not designed to work with third-party phone systems that talk generic SIP messages. While I can tell you that Cisco recommends using SIP firmware 8.3.2 SR1S, I cannot provide the firmware files because of their licensing agreements. Assuming you can get the correct firmware copied to your tftp server, and your DHCP server is serving out Option 66 to tell the phones where to look for its config files (yes, these are mandatory requirements), then we can get into how to actually configure the phones themselves.
To start off with I have created a set of files that will help you get started, you can download the set here (download).
Inside the zip file are the following files:
- SEP7975.cnf.xml – A clean example file
- SEP0023331BEA0A.cnf.xml – Same as the previous but showing how the mac address is added to the file
- Desktops320x216x167975Logo.png – Background image for phone
- Desktops320x216x167975Logo-TN.png – Thumbnail image
- Desktops320x216x16List.XML – Background image config file
Let’s assume your phone’s mac address is 0023331BEA0A, we will need a file named SEP0023331BEA0A.cnf.xml for the phone to configure itself. Using the included files as a guide, we need to edit the following lines:
Line 27: <processNodeName>192.168.5.49</processNodeName>
Change IP address to IP address of your PBX system. Using a host name tends to cause the phone to not parse the file properly.
Line 71: <authenticationURL>http://{TBexternalIPaddress}/xmlservices/authentication.php</authenticationURL>
Line 72: <directoryURL>http://{TBexternalIPaddress}/xmlservices/PhoneDirectory.php</directoryURL>
Line 75: <informationURL>http://{TBexternalIPaddress}/xmlservices/index.php</informationURL>
Line 78: <servicesURL>http://{TBexternalIPaddress}/xmlservices/index.php</servicesURL>
If you are using XML services you will need to change the above lines to the correct URLs.
Line 155: <phoneLabel>VoipStore </phoneLabel>
Now I know you don’t want to change this 🙂
Line 160: <featureLabel>402</featureLabel>
Line 162: displayName>402</displayName>
This is the text shown next to the line key, usually the extension number
Line 161: <name>001FCA368894</name>
Line 163: <contact>001FCA368894</contact>
Line 170: <authName>001FCA368894</authName>
Lines 161, 163, and 170 are the SIP login, on some systems this is the extension (trixbox CE, 3CX, FreePBX) and on others it is the mac address (trixbox Pro).
Line 164: <proxy>192.168.5.49</proxy>
The proxy IP address is the IP address of your IP PBX system.
Line 171: <authPassword>9svHcd92t4H</authPassword>
The auth password is the SIP password (secret on some systems) for this extension
Line 174: <messagesNumber>8555</messagesNumber>
This value is the number to dial to access the voicemail system. On trixbox Pro this is 8555, on trixbox CE it is *97, for 3CX this is 999.
Lines 184 – 209 repeat the same information to add another active line key, you can continue adding sections like this for all eight line keys.
Adding the background image
If you copy the existing files from the zip file to the right locations, you should be able to activate a new background image for your phone. Press the Settings key, then 1 for User Preferences, then 2 for Background images, use the directional keypad to move to the image you want to use, then press the Select softkey, then press the Save softkey. Your new background image will now display in all its glory.
Troubleshooting
I cannot begin to stress how picky these phones are with their configuration files. If you are making changes and rebooting the phone and your changes do not seem to be taking effect, go to Settings, Status, Status Messages to get a list of errors that the phone is encountering. Typical ones to ignore are the following:
- Error updating Local
- No CTL installed
- File not found: CTLFile.tlv
Those are actually “normal”, what you do not want to see is “Unable to Parse file”, that will tell you that it did not like something in your config file. This can be something like using a host name when it wants an IP address. Just understand that you will probably experience quite a bit of frustration getting the 7975 to work properly, but with enough persistence it actually is possible.

